
iOS7.1からEnterprise Distributionを行うにはHTTPSを使う必要が出てきました。 開発中のアプリケーションを実機でテストする場合にもとても便利な機能なので残念です。今までは手元にあるWindows XPのIISを手軽に使っていたのですが、私自身IISの深い知識は無いのでどのようにHTTPSを稼働させるのか良くわかりません。そのため、Mervericsに標準でインストールされているapatchでHTTPSサーバを立てる事にしました。
以下はその手順です。
まずはスーパーユーザーになり以下の手順で公開鍵などを作成してきます。
1. 秘密鍵の作成
パスフレーズの入力を求められますが、これは忘れないようにして下さい。その後の処理にも必要になります。
root# openssl genrsa -out server.key -aes128 1024
Generating RSA private key, 1024 bit long modulus
......................++++++
......++++++
e is 65537 (0x10001)
Enter pass phrase for server.key:
Verifying - Enter pass phrase for server.key:
2. 秘密鍵でCSRを作成
Common Nameは本来はドメイン名を使いますが、ここではDNSで管理していないマシンを使うため、IPアドレスをそのまま指定しています。
root# openssl req -new -key server.key -out server.csr
Enter pass phrase for server.key:
You are about to be asked to enter information that will be incorporated
into your certificate request.
What you are about to enter is what is called a Distinguished Name or a DN.
There are quite a few fields but you can leave some blank
For some fields there will be a default value,
If you enter '.', the field will be left blank.
-----
Country Name (2 letter code) [AU]:JP
State or Province Name (full name) [Some-State]:Saitama
Locality Name (eg, city) []:Saitama
Organization Name (eg, company) [Internet Widgits Pty Ltd]:FuturesVision
Organizational Unit Name (eg, section) []:
Common Name (e.g. server FQDN or YOUR name) []:192.168.11.3
Email Address []:xxx@futuresvision.net

Please enter the following 'extra' attributes
to be sent with your certificate request
A challenge password []:
An optional company name []:
3. 証明書の認証要求の作成
毎年更新するのも面倒ですので、この例では有効期限を約100年にしました。
root# openssl x509 -in server.cer -days 36500 -req -signkey server.key -out server.crt
Signature ok
subject=/C=JP/ST=Saitama/L=Saitama/O=FuturesVision/CN=192.168.11.3/emailAddress=xxx@futuresvision.net
Getting Private key
Enter pass phrase for server.key:
4. apatchの設定
/private/etc/apache2/httpd.conf を編集し、HTTPSを有効にします。490行目のコメントを外します。
# Various default settings
#Include /private/etc/apache2/extra/httpd-default.conf

# Secure (SSL/TLS) connections
Include /private/etc/apache2/extra/httpd-ssl.conf
#
# Note: The following must must be present to support
/private/etc/apache2/extra/httpd-ssl.confを編集し、先ほど作った証明書を読み込むなのどの設定をします。設定が必要なのは以下の項目です。
- ServerName
- SSLCertificateFile
- SSLCertificateKeyFile
ServerNameはCSRの作成時に指定したCommon Nameと同じにします。
#   General setup for the virtual host
 DocumentRoot "/Library/WebServer/Documents"
 ServerName <span style="color: #ff0000;">192.168.11.3:443</span>
 ServerAdmin <span style="color: #ff0000;">xxx</span>
 ErrorLog "/private/var/log/apache2/error_log"
 TransferLog "/private/var/log/apache2/access_log"
下記の設定でもわかりますように、先ほど作成したファイルは /private/etc/apache2/config/ の下に置いてあります。
#   Server Certificate:
#   Point SSLCertificateFile at a PEM encoded certificate.  If
#   the certificate is encrypted, then you will be prompted for a
#   pass phrase.  Note that a kill -HUP will prompt again.  Keep
#   in mind that if you have both an RSA and a DSA certificate you
#   can configure both in parallel (to also allow the use of DSA
#   ciphers, etc.)
<span style="color: #ff0000;">SSLCertificateFile "/private/etc/apache2/config/server.crt"</span>
#SSLCertificateFile "/private/etc/apache2/server-dsa.crt"

#   Server Private Key:
#   If the key is not combined with the certificate, use this
#   directive to point at the key file.  Keep in mind that if
#   you've both a RSA and a DSA private key you can configure
#   both in parallel (to also allow the use of DSA ciphers, etc.)
<span style="color: #ff0000;">SSLCertificateKeyFile "/private/etc/apache2/config/server.key"</span>
#SSLCertificateKeyFile "/private/etc/apache2/server-dsa.key"
5. apatchを起動します
起動時にはパスフェーズの入力が必要です。
oot# /usr/sbin/httpd -k restart
httpd: Could not reliably determine the server's fully qualified domain name, using MacBook-Air.local for ServerName
httpd not running, trying to start
Apache/2.2.26 mod_ssl/2.2.26 (Pass Phrase Dialog)
Some of your private key files are encrypted for security reasons.
In order to read them you have to provide the pass phrases.

Server 192.168.11.3:443 (RSA)
Enter pass phrase:
6. 証明書をiOSデバイスにインストール
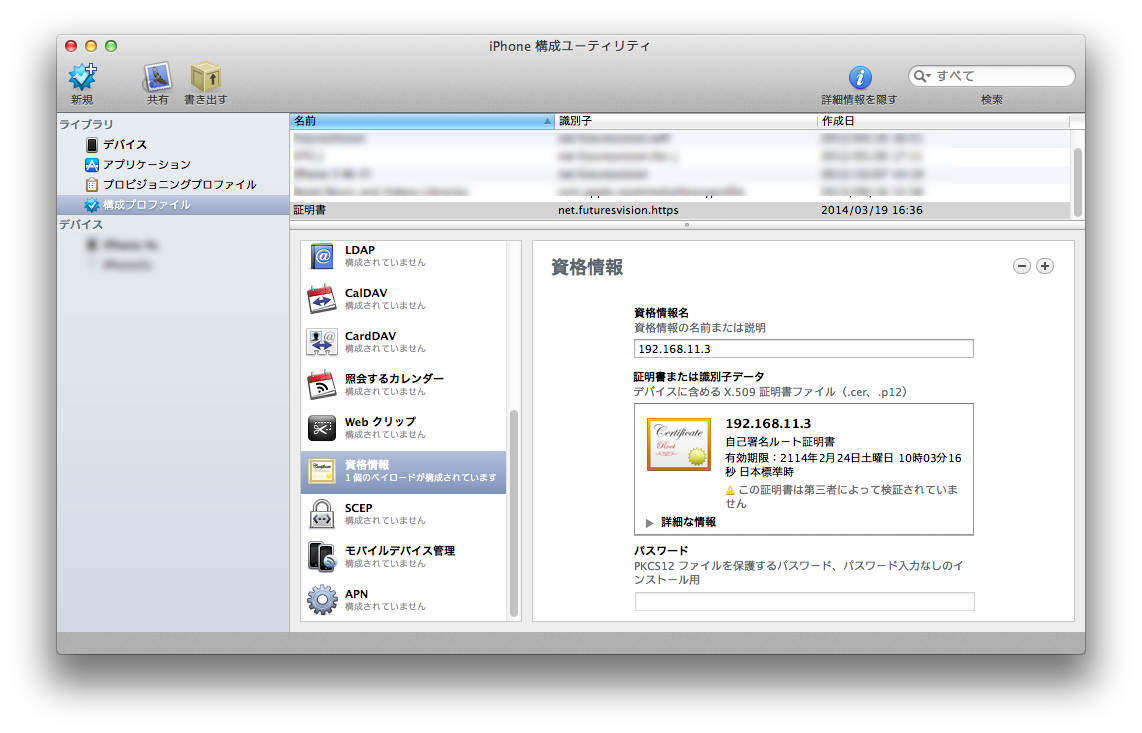
iPhone構成ユーティリティを起動します。
「構成プロファイル」を選び、ファイルメニューから新規作成します。
「一般」で名前などを入力したら 「資格情報」から先ほど作成したCSRを読み込みます。
デバイスをUSB接続していれば「デバイス」に表示されますので、 インストールしたいデ
バイスを選んでインストールします。
以上で設定は完了です。
apacheの標準の設定ではDocumentRootは “/Library/WebServer/Documents” になっていま
すので、適当なHTMLを置いて、アプリケーションをダルンロード出来るようにします。


Leave a Reply